 how-to
How to Keep Your Planter Box From Rotting
Table of Contents
- Why Wooden Planter Boxes Rot
- How to Waterproof a Wooden Planter Box
- Planter Box Drainage Ideas to Prevent Standing Water
- Choosing the Best Liner for a Wooden Planter Box
- Selecting Rot-Resistant Wood and Expected Lifespan
- Elevation, Maintenance, and Repair
- Conclusion
- Frequently Asked Questions
Last Updated: October 17, 2026
Why Wooden Planter Boxes Rot
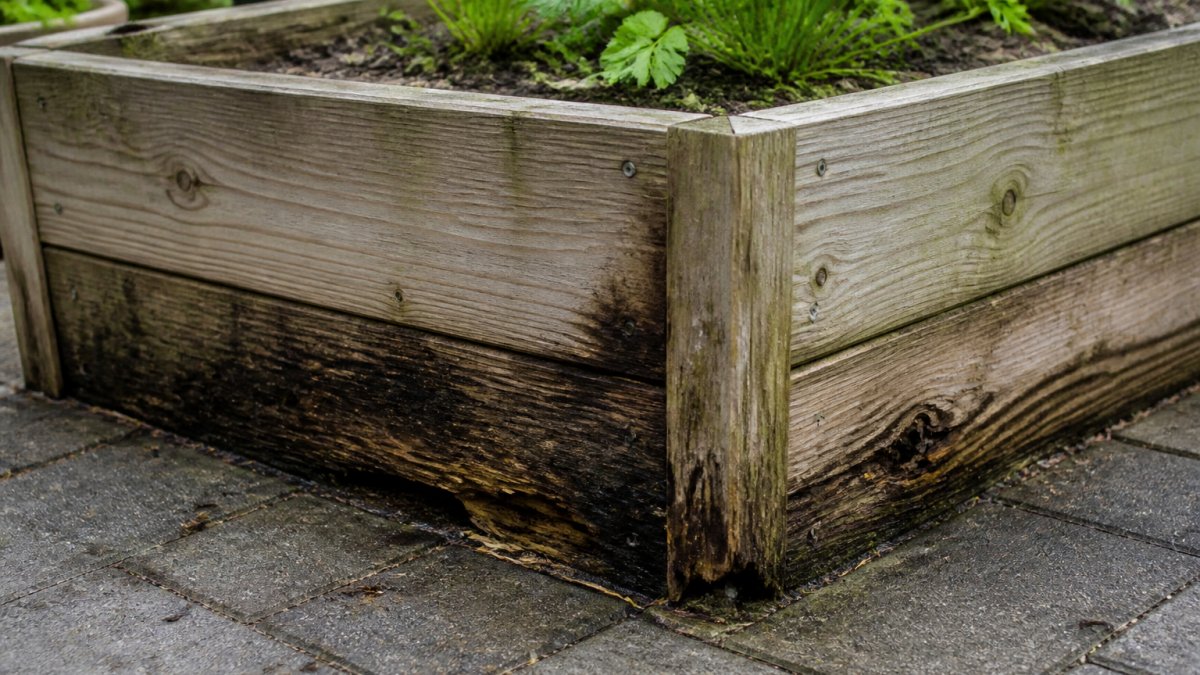
Wooden planter box rotting happens because wood absorbs moisture. When soil stays wet against wood, fibers break down and the structure weakens fast.
Planter boxes sit in wet conditions all season.
Freeze-thaw cycles make it worse: water enters the wood, freezes, expands, and cracks the fibers.
Location matters too. Shaded boxes stay damp longer, and boxes sitting on soil or grass absorb moisture from below.
Prevention is critical: stopping moisture from reaching the wood beats repairing rot later. Sealed wood, lined boxes, and proper drainage work together to keep planter boxes standing for years.
How to Waterproof a Wooden Planter Box
Waterproofing a wooden planter box means creating a barrier between the wood and moisture. Several methods work, and many gardeners combine them for maximum protection.
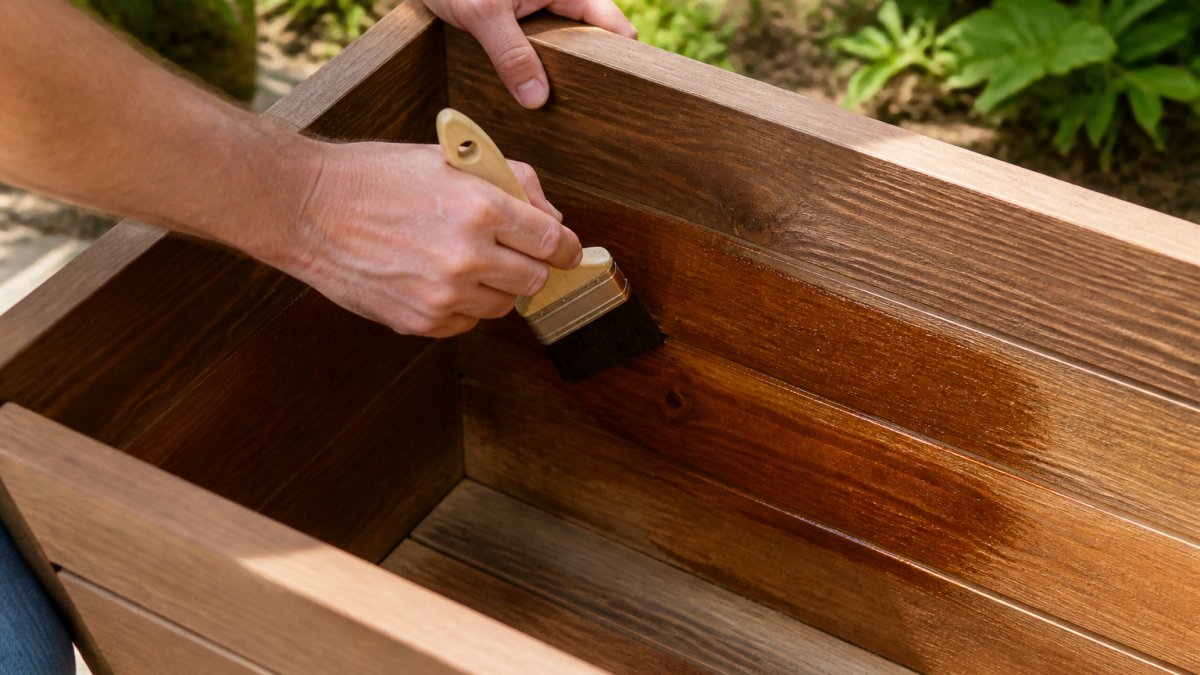
Applying Protective Sealants and Oils
Sealants and oils coat the wood surface and slow water penetration. They're not perfect barriers, but they extend the life of your planter significantly.
Sealants come in two types: oil-based, which penetrates deeper, and water-based, which dries faster and is easier to reapply.
Apply sealant to all surfaces, exterior, interior, and especially the bottom, which takes the most water damage from wet soil.
The interior matters as much as the outside: soil water soaks into unprotected interior wood, so seal the inside walls and bottom thoroughly.
Reapplication is the catch, recoat every year or two or the protection fades.
Using Beeswax as a Natural Wood Preservative
Beeswax is a traditional wood preservative that many gardeners prefer for food gardens. It's natural, food-safe, and effective at slowing water absorption.
Beeswax fills wood pores and creates a water-resistant layer. It's less durable than modern sealants but gentler near edible plants.
Apply with a cloth or soft brush, rub in thoroughly, and buff the excess. The wood darkens slightly and gains a subtle shine. Reapply every 6-12 months, more often in wet climates.
Beeswax works best as a maintenance step combined with other methods, not standalone. Many gardeners use it on the interior for food safety and a stronger sealant on the exterior.
Planter Box Drainage Ideas to Prevent Standing Water
Standing water is the fastest path to planter box rotting. A planter holding saturated soil against the wood fails years before its lumber's rated lifespan, no matter how well you sealed it. Good drainage is a system of holes, elevation, airflow, and a drainage layer working together, the specifics below determine whether water leaves the box or sits in it.
Sizing and spacing drainage holes
A common mistake is too few or too-small holes. For a standard 4-foot by 2-foot planter, drill at least 6 to 8 holes, each 1/2 to 3/4 inch in diameter, spaced evenly across the bottom, with extras near corners and the lowest edge on uneven ground.
Cover each hole from the inside with a piece of landscape fabric or a fine mesh screen. This lets water pass but keeps soil from washing out and blocking the opening. Do not use gravel alone over the holes, fine soil migrates into the gravel and seals it over time.
Elevation and under-box airflow
Lifting the planter stops the bottom wicking moisture from soil, grass, or a wet deck and lets air move underneath so it dries between waterings. Raise it 2 to 4 inches on pressure-treated offcuts, composite shims, bricks, or planter feet, and leave the space open, never set it on a solid slab that traps damp air.
On a wood deck, use rubber or composite feet rather than direct wood-to-wood contact. That small gap keeps both the planter and the deck from staying wet against each other.
The drainage layer inside the box
Add 1 to 2 inches of washed gravel, crushed stone, or broken terracotta before the soil. It gives water a fast path to the holes and keeps fine soil off the bottom board. Top it with landscape fabric so soil doesn't settle into the voids.
One caveat: a drainage layer does not fix a box with too few holes. It only helps water that already has somewhere to go.
Ventilation gaps and the liner trap
If you line the box with plastic, the liner itself can trap moisture: water condenses on its back, runs down, and sits in the gap between liner and board, a permanently damp pocket that rots wood faster than bare soil would.
To avoid it:
- Leave a small air gap (about 1/4 to 1/2 inch) between the liner and the interior wood where practical, or use a breathable liner such as landscape fabric rather than solid plastic.
- If you use solid plastic, slope it so any condensation runs toward the drainage holes, and do not staple it tight against the bottom board.
- Do not pack soil tight against the interior walls. Leave a 1-inch gap at the top so air can circulate and the upper wood can dry.
- Keep the space between the liner and the wood clear of soil and debris.
Slope and leveling
Water only drains if it reaches the holes. Set the box level or give it a slight tilt (about 1/8 inch per foot) toward the drainage holes, and shim the low side on uneven ground rather than letting water pool in a corner.
Checking drainage after a heavy rain
Test it: water thoroughly and watch the holes. Water should run out within a minute or two. If it trickles, the holes are clogged or the drainage layer is saturated with fines, clear the holes, and if it repeats, add more holes or replace the gravel. A planter that drains slowly after every rain is quietly rotting.
Choosing the Best Liner for a Wooden Planter Box
A liner is a barrier between wood and soil, one of the most effective ways to protect a planter box from rotting.
Even with sealant, soil moisture eventually reaches unprotected wood. A liner prevents that direct contact.
Plastic liners are durable, affordable, and create a complete moisture barrier. Landscape fabric is breathable, allowing some air circulation while still blocking soil moisture from the wood.
Lining Options for Edible Gardens
For vegetable and herb gardens, material choice matters, some liners leach chemicals into soil.
Food-safe options include untreated landscape fabric, burlap, or food-grade plastic. Avoid liners treated with pesticides or synthetic chemicals, and check the label for edible-plant safety.
Burlap is natural and biodegradable, working as a temporary liner (1-2 years) while you transition to another method.
Old cardboard is free, food-safe, and biodegradable, but breaks down within 1-2 seasons, layer it 3-4 sheets thick for better durability.
Install the liner by stapling it to the interior walls or laying it along the bottom and sides.
Selecting Rot-Resistant Wood and Expected Lifespan
Wood choice sets the ceiling on how long a planter lasts, two boxes built the same way from different lumber can differ by a decade or more. The table below compares common choices with realistic lifespan ranges for a planter in soil contact and exposed to weather. Treat the ranges as planning estimates; climate, drainage, and maintenance move the number significantly.
| Wood | Rot resistance | Typical lifespan in a planter | Food-garden notes | Cost tier |
|---|---|---|---|---|
| Untreated pine or spruce | Low | 2-4 years | Safe, but short-lived; not worth sealing for the long haul | $ |
| Cedar | High (natural oils) | 10-15 years | Safe untreated; good default for edible gardens | $$ |
| Redwood | High | 12-18 years | Safe untreated; similar to cedar, often pricier | $$$ |
| Pressure-treated lumber | High (chemical) | 15-20 years | Modern residential treatments are considered safe for edibles when properly dried and sealed; confirm the label | $$ |
| Tropical hardwoods (ipe, cumaru) | Very high | 20+ years | Safe untreated; heavy, hard to work, expensive | $$$$ |
| Black locust or white oak | High | 15-20 years | Safe untreated; availability varies by region | $$-$$$ |
Why the ranges move
Three factors shift a species up or down within its range:
- Soil contact. Wood that touches wet soil rots far faster than wood that only sees rain. A cedar box on feet with a drainage layer can land at the top of its range; the same cedar sitting directly on damp ground can land at the bottom.
- Climate. A wet, humid climate with frequent rain keeps wood damp longer and pushes lifespan down. A dry climate with good airflow pushes it up. Freeze-thaw cycles add cracking that accelerates decay.
- Maintenance. A sealed, inspected, recoated box lasts longer than an ignored one. The species sets the ceiling; maintenance decides how close you get to it.
Matching wood to the job
For an edible garden, the simplest safe choice is untreated cedar or redwood, both resist rot without chemicals. Pressure-treated lumber is widely used for raised beds and generally considered safe for edibles in modern residential formulations, but check the label and let it dry thoroughly before filling. Avoid salvaged or older pressure-treated wood of unknown origin; older formulations used chemicals no longer permitted for food gardens.
If budget is the constraint, untreated pine is fine for a short-term box, but don't spend money sealing wood that will fail in a few years, put the savings toward cedar or a longer-lived species.
What to check before you buy
- Look for heartwood rather than sapwood, the darker, denser center of the board resists rot better.
- Avoid boards with large knots, checks, or soft spots; those are entry points for water.
- For cedar and redwood, ask for the rot-resistant grade rather than appearance grade if the box will be in soil contact.
- Store lumber dry and off the ground before building so it does not start the project already damp.
The takeaway: pick the most rot-resistant wood your budget allows, then let drainage, elevation, and maintenance carry it to the top of its lifespan range.
Elevation, Maintenance, and Repair
Elevation and regular maintenance extend a planter's life dramatically.
Elevation is your first line of defense.
Check the bottom annually by pushing a screwdriver into the corners and bottom edge. If it sinks in easily, rot has started; if it's solid, you're good.
For rot affecting structural integrity, replace rather than repair, a mostly rotted box can collapse under the weight of soil and plants.
Clean the interior annually: remove old soil and debris to stop moisture accumulating, inspect the interior walls, and reapply beeswax or sealant as needed.
Conclusion
Wooden planter boxes rot because wood absorbs moisture, but you can prevent it. Waterproofing with sealants or oils, adding a protective liner, ensuring proper drainage, and choosing rot-resistant wood all work together to keep your boxes standing for years.
At Beloit Plastics LLC, we understand that gardeners want solutions that last. Our durable planter saucers and outdoor garden accessories are engineered to protect your decks and surfaces from water damage while your wooden boxes do their job. With proper waterproofing, drainage, and maintenance, your wooden planter boxes can stay beautiful and functional for a decade or more.
Frequently Asked Questions
How can I waterproof a wooden planter box?
Apply a water-resistant sealant or protective coating to both the interior and exterior surfaces. Linseed oil and tung oil penetrate the wood and offer natural protection, while beeswax creates a durable barrier. For edible gardens, choose food-safe sealants. Allow proper curing time (typically 24-48 hours) before planting. Reapply annually or as needed, especially in freeze-thaw climates.
Should I line the inside of a wooden planter box?
Yes, lining reduces direct soil contact with wood and significantly slows decay. For edible gardens, use food-safe liners like landscape fabric or plastic sheeting. Non-food gardens can use heavier plastic or rubber liners. Ensure the liner doesn't trap moisture; include drainage holes to prevent standing water and root rot.
How long will a wooden raised garden bed last?
Lifespan depends on wood species and protection methods. Cedar and redwood naturally resist rot and last 10-15 years or longer. Untreated softwoods may last only 3-5 years. Sealed, lined, and properly elevated planters extend longevity significantly. Routine maintenance, resealing annually and checking for damage, adds years to any wooden planter box.
What should I put in the bottom of a planter box to prevent rot?
Create a drainage layer using gravel or coarse sand at the bottom, then add landscape fabric to separate drainage material from soil. This prevents soil from sitting directly on the wood and blocks water from pooling. Ensure drainage holes in the planter box allow excess water to escape. Elevate the entire planter off the ground on feet or a base to allow air circulation underneath.