 how-to
How to Remove Hard Water Stains From Planters
Table of Contents
- Understanding Hard Water Stains on Planters
- How to Remove Hard Water Stains From Plastic Pots
- Using Vinegar to Remove Hard Water Stains From Pots
- How to Clean Terracotta Pots Safely
- How to Prevent Hard Water Stains on Planters
- Material-Specific Cleaning Guide
- Common Mistakes to Avoid When Cleaning Planters
- Conclusion
- Frequently Asked Questions
Last Updated: October 20, 2026
Understanding Hard Water Stains on Planters
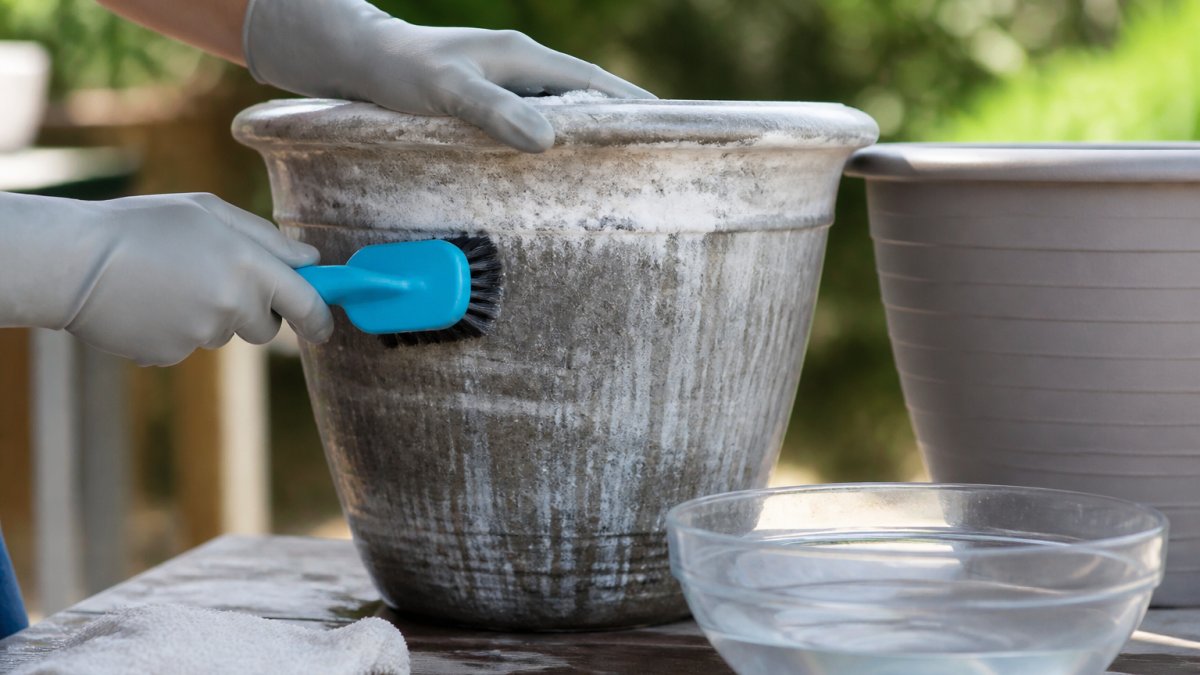
Hard water stains on planters are white, chalky deposits left when mineral-rich water evaporates and leaves behind calcium, lime, and other dissolved salts. Learning how to remove hard water stains from planters keeps containers looking attractive year-round.
What Causes White Residue and Mineral Deposits
Mineral deposits form when hard water, high in calcium and magnesium, sits on planter surfaces and dries, leaving salts that accumulate over time, especially with unfiltered tap water.
Residue builds fastest in warm, dry climates where evaporation is rapid.
Distinguishing Mineral Deposits From Other Stains
Not all white residue is hard water stain. Here's how to tell the difference:
- Hard water deposits feel chalky and flake off easily with a fingernail. They're white or cream-colored and appear in rings or patches where water has dried.
- Dirt and soil brushes away without resistance and doesn't leave a hard coating.
- Algae and mold appear greenish or black and feel slimy when wet. They grow in consistently moist areas.
Mineral deposits are purely cosmetic, they don't harm plants or the planter, but they make containers look neglected, especially on visible patios and porches.
How to Remove Hard Water Stains From Plastic Pots
Plastic planters are durable and weather-resistant. Removing hard water stains from plastic pots is straightforward with the right steps.
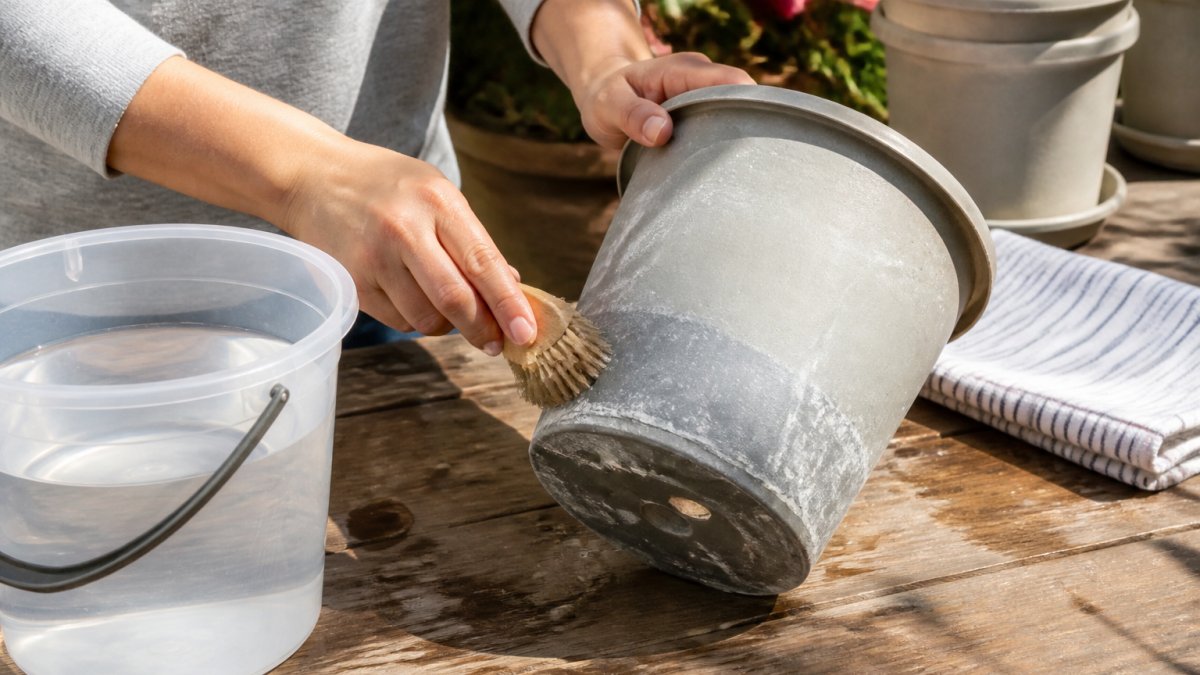
Step 1: Soak and Assess
Fill a bucket with equal parts white vinegar and water and submerge the plastic pot for 20 to 30 minutes, letting the mild acid dissolve mineral deposits. Light deposits may come off with soaking and rinsing alone; thick buildup needs scrubbing.
Step 2: Scrub With the Right Brush
After soaking, use a soft-bristled brush or non-abrasive pad to gently work away deposits in circular motions, focusing on the thickest areas.
Avoid hard-bristle brushes or steel wool, which scratch and dull plastic. For stubborn deposits, soak another 10 minutes and scrub again.
Step 3: Rinse Thoroughly
Rinse completely under clean running water, dry with a clean cloth to prevent new water spots, and repeat the soak-and-scrub if deposits remain. For indoor plastic pots, a gentle dishwasher cycle after the vinegar soak helps remove remaining deposits.
Using Vinegar to Remove Hard Water Stains From Pots
White vinegar is one of the most effective, affordable solutions for removing mineral deposits from planters, plant-safe, gentle on most surfaces, and readily available.
Why White Vinegar Works
Vinegar's acetic acid dissolves calcium and magnesium deposits without damaging most planter materials. Unlike harsh chemical cleaners, it's plant-safe and won't harm soil or roots if residue remains, and it also cuts through fertilizer residue and light algae.
Vinegar Soaking Method
Mix equal parts white vinegar and water, enough acid to dissolve deposits without risking delicate surfaces like terracotta. Submerge the planter if possible; for large containers, wrap soaked cloths around stained areas for at least 20 to 30 minutes.
Dilution and Contact Time
For light stains, a 1:1 ratio works well. For heavy buildup, increase to 2 parts vinegar and 1 part water, testing on a small area first.
Contact time matters more than strength: a weaker solution for 30 minutes often beats a stronger one for 5. Scrub gently and rinse thoroughly.
How to Clean Terracotta Pots Safely
Terracotta is porous and delicate compared to plastic or glazed ceramic. It requires gentler handling to avoid damage.
Why Terracotta Requires a Different Approach
Terracotta is fired clay, more fragile than other materials. Harsh scrubbing, abrasive brushes, or overly strong acids can pit the surface or weaken the pot, and its porosity means it absorbs water and solutions readily.
Gentle Cleaning for Porous Clay
Use a soft cloth or very soft brush, never hard bristles, and wipe gently. If deposits resist, soak longer rather than pressing harder.
Rinse thoroughly and air-dry completely before replanting, terracotta absorbs moisture, so air-drying beats towel-drying.
How to Prevent Hard Water Stains on Planters
Removal is the repair; prevention is the fix. The white ring on a pot records every time water evaporated off that surface, so prevention comes down to three levers: what's in the water, where the water goes, and how often the surface is wiped before deposits harden.
Know Your Water Before You Change It
Hardness is measured in grains per gallon (gpg): soft below about 3.5 gpg, moderately hard from 3.5 to 7, hard from 7 to 10.5, and very hard above that.
That number tells you how aggressively to act: soft or moderately hard water may only need regular wiping, while very hard water will scale any surface that dries repeatedly no matter how carefully you clean, switching the water source is the only durable fix.
Water-Quality Solutions That Actually Reduce Scale
- Collected rainwater. Free of the calcium and magnesium that cause scale, and generally lower in dissolved salts than tap water. Store it in a covered container and use it within a reasonable time to limit algae growth.
- Filtered or softened water. A pitcher or under-sink carbon filter removes chlorine and some sediment but not hardness minerals. Only an ion-exchange softener or reverse-osmosis unit reduces calcium and magnesium; softened water trades those minerals for sodium, fine for most plants in moderation but worth watching for salt-sensitive species.
- Distilled water for small indoor collections and propagation setups, where the volume is low enough that the cost is reasonable.
Drainage, Airflow, and Saucer Habits
Standing water deposits minerals as it evaporates and keeps the pot base constantly wet, encouraging algae and mold alongside the scale. Make sure drainage holes are open and not blocked by a saucer that seals flush against the bottom; a saucer with a ribbed or footed underside lets air move under the pot so moisture dries instead of trapping.
Austin Planter Plant Saucer White Granite Colored Polypropylene -Indoor/Outdoor →
Wiping and Maintenance Schedule
A quick wipe is far cheaper than a vinegar soak. A practical routine:
- Weekly: wipe the rim and upper sides of indoor pots with a damp cloth during regular watering.
- Monthly: wipe down outdoor planters and the patio or deck surface directly beneath them, where overspray and runoff leave their own mineral film.
- Seasonally: inspect saucers, drainage holes, and the pot base for scale, algae, or salt crust, and deep-clean before it hardens.
Wiping works because mineral deposits are soft when fresh and become hard and adherent as they dry and recrystallize. Removing the film before it sets is the single highest-leverage prevention step.
Plant-Safe Handling During Cleaning and Prevention
Prevention and cleaning both involve moving pots and wetting soil, so protect the plant while you work:
- Water the plant a day before cleaning so the root ball holds together.
- Slide the root ball out rather than pulling the plant by the stems; support it in a bucket or wrap it in a damp towel.
- Shield exposed roots and soil from vinegar spray with plastic wrap or a plastic bag.
- Rinse cleaned pots thoroughly and let them dry completely before replanting, residual acid and moisture both stress roots.
- Replant at the same soil depth and water lightly to settle the soil.
When Prevention Is Not Enough
If scale keeps returning within weeks despite wiping and saucer discipline, the water is the problem, not your technique. Switch to rainwater or filtered water for that plant, or accept a periodic vinegar soak as routine maintenance.
Material-Specific Cleaning Guide
Most cleaning guides treat every pot the same, which is how people ruin a good planter. The material under the stain determines how much acid, abrasion, and soaking it can take. Use the table below as a starting point, then read the notes for the material you actually own.
| Material | Mildest effective method | Vinegar dilution | Max dwell time | Brush | Main risk |
|---|---|---|---|---|---|
| Glazed ceramic | Dish soap + soft brush | 1:1, up to 2:1 | 30 min | Soft nylon or non-scratch pad | Chipping; glaze crazing from thermal shock |
| Unglazed terracotta | Soft cloth + diluted vinegar | 1:3 | 15-20 min | Very soft brush only | Pitting, waterlogging, efflorescence |
| Plastic (PP, HDPE) | Vinegar soak + soft brush | 1:1 | 30 min | Soft to medium nylon | Scratching and dulling from abrasives |
| Concrete and cast stone | Soap first, then vinegar | 1:1 | 20-30 min | Medium stiff nylon | Acid etching the cement matrix |
| Metal (galvanized, aluminum, steel) | Soap + water, then brief vinegar wipe | 1:3, wipe only | 5 min | Soft cloth | Acid attacking zinc or aluminum; rust |
| Fiberglass and resin | Vinegar or soap | 1:1 | 20 min | Soft to medium nylon | Solvent cleaners clouding the gel coat |
Glazed Ceramic Pots
Glaze is a glass-like finish fired onto the clay, so it resists water and stains far better than bare clay. A 1:1 white vinegar and water solution is safe here, and you can step up to 2 parts vinegar to 1 part water for ring-shaped scale that has baked on.
Unglazed Terracotta and Clay
Terracotta is fired but not sealed, so it is porous and absorbs whatever you put on it.
Use 1 part vinegar to 3 parts water, keep contact to 15-20 minutes, and wipe with a soft cloth rather than scrubbing.
Concrete and Cast Stone Planters
Concrete is alkaline by nature and porous, so it holds mineral deposits and also leaches its own salts. Start with mild dish soap and a medium-stiff nylon brush; many surface stains lift without acid. If scale remains, apply 1:1 vinegar for 20-30 minutes and rinse well.
Plastic and Polypropylene Resin Pots
Plastic and polypropylene resin do not absorb water, so deposits sit on the surface and come off easily. A 1:1 vinegar soak for 20-30 minutes followed by a soft to medium nylon brush handles almost everything. Because the color is molded through the resin, light scratches do not expose a different color underneath.
Metal Planters and Galvanized Containers
Metal is the material most often damaged by well-meaning cleaning. Vinegar is an acid, and acid attacks zinc in galvanized steel and the oxide layer on aluminum.
If you see rust, treat it as a separate problem: remove loose rust, dry the surface completely, and spot-prime before repainting.
Fiberglass and Resin Composite
Fiberglass planters have a gel-coat finish that resists staining but can be clouded by solvents and harsh abrasives. Vinegar at 1:1 or plain dish soap is sufficient; scrub with a soft to medium nylon brush and rinse.
Common Mistakes to Avoid When Cleaning Planters
Learning what not to do saves time and prevents damage.
Don't use steel wool or hard metal brushes on any planter material.
Avoid soaking terracotta for more than 20 minutes or using vinegar solutions stronger than 1:3.
Don't neglect drainage.
Don't assume all white residue is hard water stain.
Conclusion
Understanding how to remove hard water stains from planters is manageable with the right approach. White vinegar soaking combined with gentle scrubbing restores most planters to their original appearance.
Prevention through filtered water, proper drainage, and regular maintenance keeps planters looking fresh longer. Using plant saucers like Beloit Plastics LLC's Austin Planter saucers protects both your containers and the surfaces beneath them.

Frequently Asked Questions
How do I remove years of hard water stains from planters?
Stubborn, long-term mineral deposits require extended soaking and repeated treatments. Soak the planter in a 1:1 white vinegar and water solution for 30-60 minutes, then scrub with a soft brush. For thick buildup, apply the vinegar solution multiple times over 2-3 days. Baking soda paste can tackle remaining deposits. Avoid harsh chemicals that may damage the planter material or harm plants when replanting.
Can I use baking soda to remove hard water stains from planters?
Yes. Baking soda is effective for mineral deposits and gentler than abrasive scrubbing alone. Mix baking soda with a small amount of water to form a thick paste, apply it to the stained areas, and let it sit for 15-20 minutes. Scrub gently with a soft brush, then rinse thoroughly. For best results, combine baking soda with vinegar: the chemical reaction helps break down stubborn calcium and lime scale deposits.
How do I clean a planter without harming the plant inside?
Clean the exterior and interior rim only, avoiding direct contact with soil or roots. If the plant is small enough, remove it temporarily and place it in a safe spot. Use mild solutions like diluted vinegar or dish soap rather than harsh chemicals. Rinse thoroughly so no residue contacts the soil when you replant. For planters with active plants, focus on the outside surface and use gentle brushing to avoid disturbing the root system.
How can I prevent hard water stains from returning to my planters?
Use a plant saucer designed to catch excess water drainage, which reduces mineral buildup on the planter exterior. Consider filtered or distilled water if your tap water is extremely hard. Allow planters to dry between waterings to minimize mineral salt accumulation. Regular light cleaning every 2-3 weeks prevents deposits from hardening. Polypropylene resin saucers like the Austin Planter saucer at $9.99 include a support grid to allow airflow, reducing moisture contact and stain formation.